Colin Roy Barrett
Our boat 'Kahawi' had installed (by a previous owner) some brushed nylon, foam-backed headlining over the length of the fore-cabin. It had suffered from various abuses over the years and did not exactly enhance the appearance of our "Classic Freeman Cruiser". One particularly bad stain (Coca-Cola was it?) didn't help, but the main trouble was the front section, which was coming unstuck in several places. The problem worsened on damp days, but clearly something had to be done - and soon!
At some time in the boats history, we know that one - in places two - layers of this foam-backed material had been glued on over the surface in athwart-ship sections (presumably corresponding to the material width). The joins had then been covered, or hidden with thin Mahogany trim strips, in keeping with the general interior finish of these craft.
Having initially removed only the front section, (thinking we might be able to re-stick it), we soon realised that the whole roof would have to be recovered and so we stripped it all off one dreary day during the winter re-fit.
The original Freeman roof finish would have been raw GRP with a lick of anti-condensation paint applied, not in itself too unsightly. I initially had ideas about reverting to this finish, if the cost of new material proved too expensive.
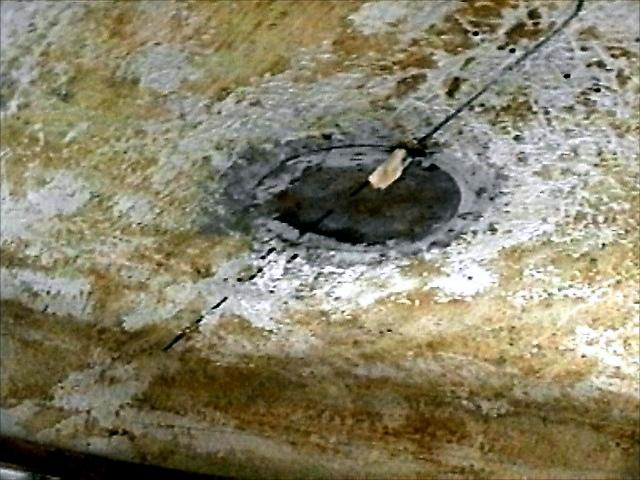
After the old headlining was removed, we were horrified to see the entire ceiling of the front cabin covered in 20-year-old "Evostick" with the previous two layers of crumbling (and very mouldy) foam still stuck all over it.
It quickly became clear that, although very old, the glue was still highly tenacious and extremely reluctant to "let go". We now had a very much larger task on our hands than at first envisaged.
Although we have always done most of our own maintenance work aboard, (and at home) we had never tackled anything like this before. Thoughts of "nailing jelly to the ceiling" came to mind, as I imagined trying to ladle glue above my head, whilst holding 50-inch wide sheets of unwieldy material - I sought Internet advice!
The general consensus of opinion was that jobs like this were best left to the "experts" although some good information did come through, from the Yahoo Freeman Owners Group in particular. Apparently you could now buy aerosol spray-on glue, especially for this type of work. One member actually knew the previous owner of our boat and gave us the name of the company he had most likely used to purchase the material. From this we located, a vendor who still sold the identical material, in nearly the same width and colour. Others had suggested that we would need twice as much as we estimated for, due to us most likely ruining the first few sheets to be applied, as we "learnt how to do it". We would also probably need several pairs of rubber gloves and lots of solvent to remove surplus glue etc.
I ordered what I thought was sufficient material and we had a long think about how we would go about applying the lining.
In due course, 6 meters x 51 inches wide material arrived by post. Including three cans of contact spray-on adhesive. Urszula, my Wife had thought that the new material, (with stiffer foam backing) might be firm enough for us to hold up as we applied it, but we were talking about 21/2 meter lengths of the stuff, very unwieldy to say the least.
One problem with any work afloat is the lack of a "datum" to start from. All curves and three dimensional shapes, it is very hard to work out quite where to start? From previous experience (with tiling the bathroom), it occurred to me that working outwards from a centre-line was a clue here, but how do you find the true centre of a boat? Assuming(?) a few things, I struck a line from the middle of the two front windows, heading aft towards the flag-staff right aft, visible with the cabin doors open. The first photo (above right) shows the general state of the roof and my line, which can be seen to be more "true" than the original ceiling light fitting position!
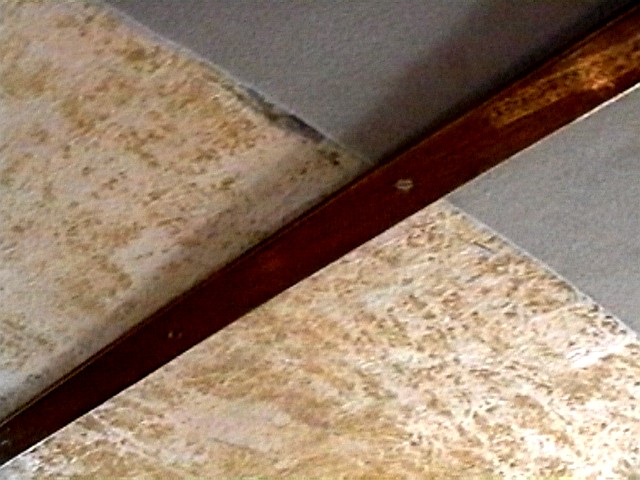
The next trick was to affix a suitable batten to the roof, to hold the material up temporarily, whilst we worked with it. Here, the original trim strips came in handy. I screwed one along the centreline, using the existing fixing holes - As per the photo (left). Here, you can see we have already cleaned off the glue from the earlier lining. This took some major effort in itself. We tried solvent, which worked but was obviously going to be expensive (and a very messy job). I attacked one section with a blow-torch, not wise! The fumes would have killed us very quickly. Urszula hand-scraped quite a lot of the old foam off, but clearly we were not making great progress. The final "fix" was a wire brush in the electric drill, working in 1/2 meter sections, we could cut right back to the paint layer and the surface looked as if it would be OK to apply the new adhesive to.
Luckily the portable drill's battery would only last about 45mins under this load. Our arms would not have gone on any longer either! Working overhead like this is very hard and of course we were constantly being showered with small bobbles of old glue. In all, I think we spent over three weeks, in 1-hour stints stripping the roof back.
This was all happening in the winter-time, with the boat on the hard. It was very cold, wet and generally depressing. It seemed as if it would be a never-ending task. At times like these, you wonder if you will ever get any enjoyment out of your boat?
We cut off a length of the new lining, using the standard width, the lining was to go athwart-ships in three sections. As supplied, it came on a cardboard tube, interleaved with brown paper. The section was carefully "middled" and we marked the exact centre. We tucked this under the batten, protected by some of the wrapping paper and aligned it exactly along the centre of the batten. If we had got this part even slighty wrong, we would have been out of alignment by the time we reached the sides of the roof. There it hung limply, waiting for some action on our part!
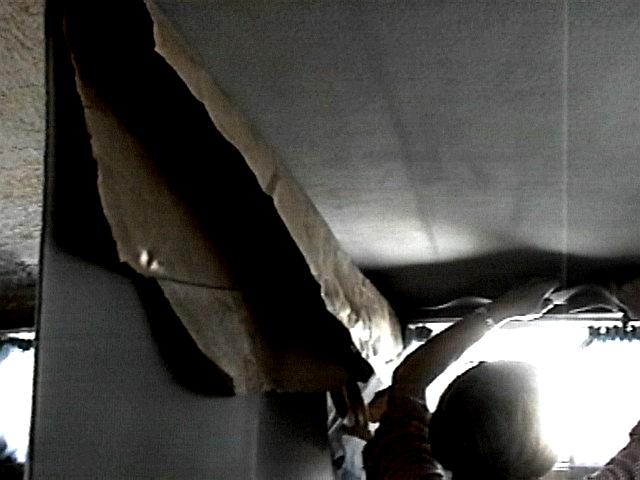
The contact glue was sprayed on the ceiling, also on the back of the lining, as it hung down from it's batten. We then used the supplied cardboard tube, to carefully and steadily roll the lining up onto the ceiling - one half at a time. As the glue had penetrated well into the foam, we could not use our fingers to press it down (up?) otherwise small dents became visible wherever we touched it!
Having stuck one half, we removed the batten and continued with the other side. Urszula was sporting a heavy cold at the time and I had to keep dragging her out to the fresh air, she being unaware of the heavy vapour content in the cabin caused by the glue spray solvent. Even with frequent breaks we both ended up with severe headaches - Perhaps glue sniffing is not a sensible leisure-time activity after all?
Work proceeded on the other sections in a similar way. The batten game was OK, but we had to choose our fixing position with care, as I could not fix a screw through any part of the lining that was likely to be seen after fitting.
We have a large flat decorator's "spatula" or "paddle" (about the best I can describe it) which we used to trim the edges. Here a disposable trimming knife also helped a great deal
Kahawi has a "Pelmet" around most of the exposed edges, we were thus able to trim these quite roughly, as they would be hidden later. Around the toilet compartment and the main bulkhead, the trimming blade and paddle enabled us to cut a perfect line to the woodwork and this looks fine in practice.
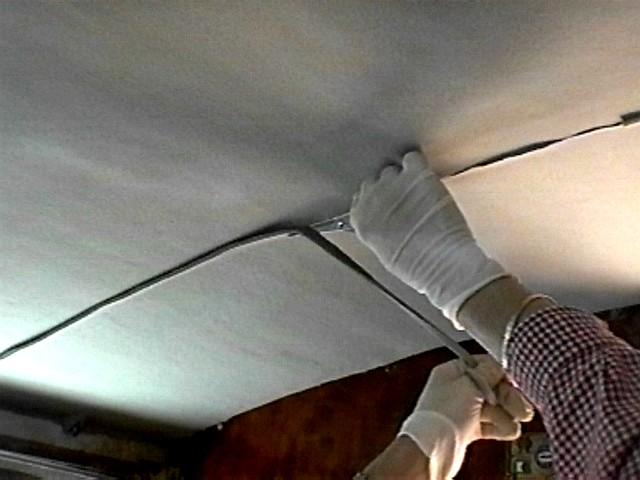
The joins were very slightly overlapped, to ensure we didn't get any gaps. Here Urszula is trimming along the line with scissors. Again we had to take care that the battens would be aligned correctly at the end and we did a lot of measuring to get the joins in the right places. As said, there appeared to have been two previous layers applied and we had several sets of screw-holes in the roof to choose from! In practise I filled these in and started again with new holes for the final fitting.
We had removed the drinks-cabinet "Bar" which lives over the hanging locker on Kahawi's starboard side. The last strip of lining went up and the bar went back in, (it is closely fitted right up to ceiling level) On the main bulkhead there was one 1/2-round bead to replace, and the job was almost finished.
I had never been impressed with the fluorescent light fittings in our main cabin, they were fine a few years ago, but had become quite dated and needed replacement. I looked around for something as efficient, but could find nothing on the market that was in keeping with the general interior decor aboard. One of our cruiser club members had told me he was running his own "On-line Chandlery" and I found there, some polished brass lights that looked right for the job. We ordered these and fitted them. Despite being tungsten bulbs, they do give out plenty of light which, with Urszula's new curtains and the general wood interior actually give a much "warmer" feel to the boat than we were used to with the fluorescent strip-lights.
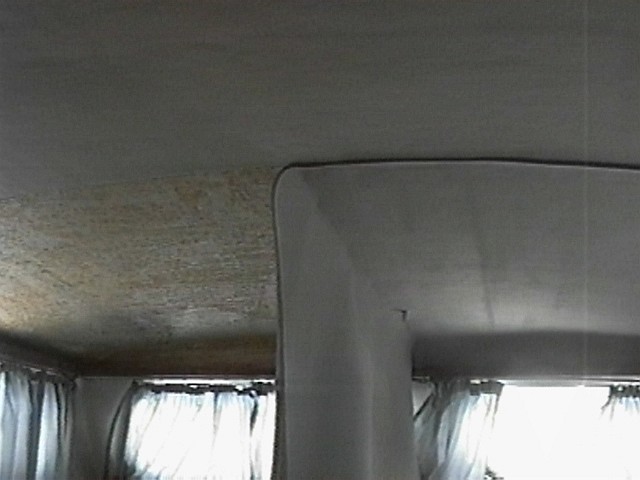
Here is the finished job, of which we are quite justifiably proud:-

